

How To Make A Floral Hair Piece
Learn how to make a beautiful DIY Floral Hair Rummage for your nuptials mean solar day!

DIY Floral Hair Comb For Your Nuptials Twenty-four hours
When I put together wedding proposals these days they are nothing like what they used to be. Gone are the days of a few centrepieces and bridal party bouquets! Tablescapes are now intricate designs and each wedding comes with its own unique floral art installation. Honestly information technology has made the task and then much more fun and creative. Weddings are also filled with special small particular items too. I love to make flowers for the seating chart, flowers for the back of the chairs, flowers for the block, and of course, flowers to article of clothing. While boutonnieres and corsages take always been staples, hairpieces are now making an appearance at most of my weddings. I totally love them. With the right supplies making doing a DIY floral pilus comb is non difficult at all.

Y'all will demand to brand a DIY Floral Hair Comb:
-
Oasis Floral Adhesive
-
A Backcomb
-
Flowers + Greenery
If you are wearing your pilus up, a backcomb is 1 of the all-time means to add flowers to your pilus. It is secure and acts as a great base on which to add your flowers. Withal, if you are having your pilus washed by stylist I ever suggest getting their advice on what would make the most sense for your hair fashion. Sometimes loose blooms or a floral crown adjust what they are doing best. However, ix/x times I am asked to make a floral crown to compliment a pilus way. They are secure and provide the perfect sized area to add flowers for your hair.
Floral mucilage is a actually key supply hither. Honestly, this stuff is magic. If you lot're a florist who has yet to detect the magic of flower gum I encourage you to get buy a tube ASAP. It adheres to flowers so well and they aren't going anywhere once glued. Promise! To get the all-time stick-power, I put a pocket-sized blob of glue (the size of a loonie) onto a cardboard scrap and allow it to get a tiny scrap tacky before using it. I like to use the stalk of a flower equally a dabbing stick to behave the glue from the cardboard to the surface that I want to glue on (either the flower or the backcomb…or both!).
Selecting your Flowers for a DIY Floral Hair Rummage
- Consider Colour. What will you (or the person you're making information technology for) be wearing? If it's for a nuptials I'll always make it to match nicely with the bridal bouquet.
- Consider Variety. Since your blossom comb volition not take a h2o source, you desire to ensure that you utilize a variety that can tolerate beingness out of water for a few hours. Some of my get-to'due south for this are: roses (garden or spray), ranunculus, carnations, and smaller make full flowers like infant's breath, wax flower or greenery. You don't want anything that is too big considering you want the flower to attach securely to the small bit of expanse that you have to glue to on the backcomb. If the bloom is too big it volition be wobbly and potentially fall off. A small bloom will stick to the pilus rummage with no problem.
- Design your backcomb first, so choose the flowers. I like to have a focal bloom along with some smaller pieces similar buds, fill flowers, and greenery. Choosing a few different textures volition make your comb more than interesting.

How To Make a DIY Floral Dorsum Comb
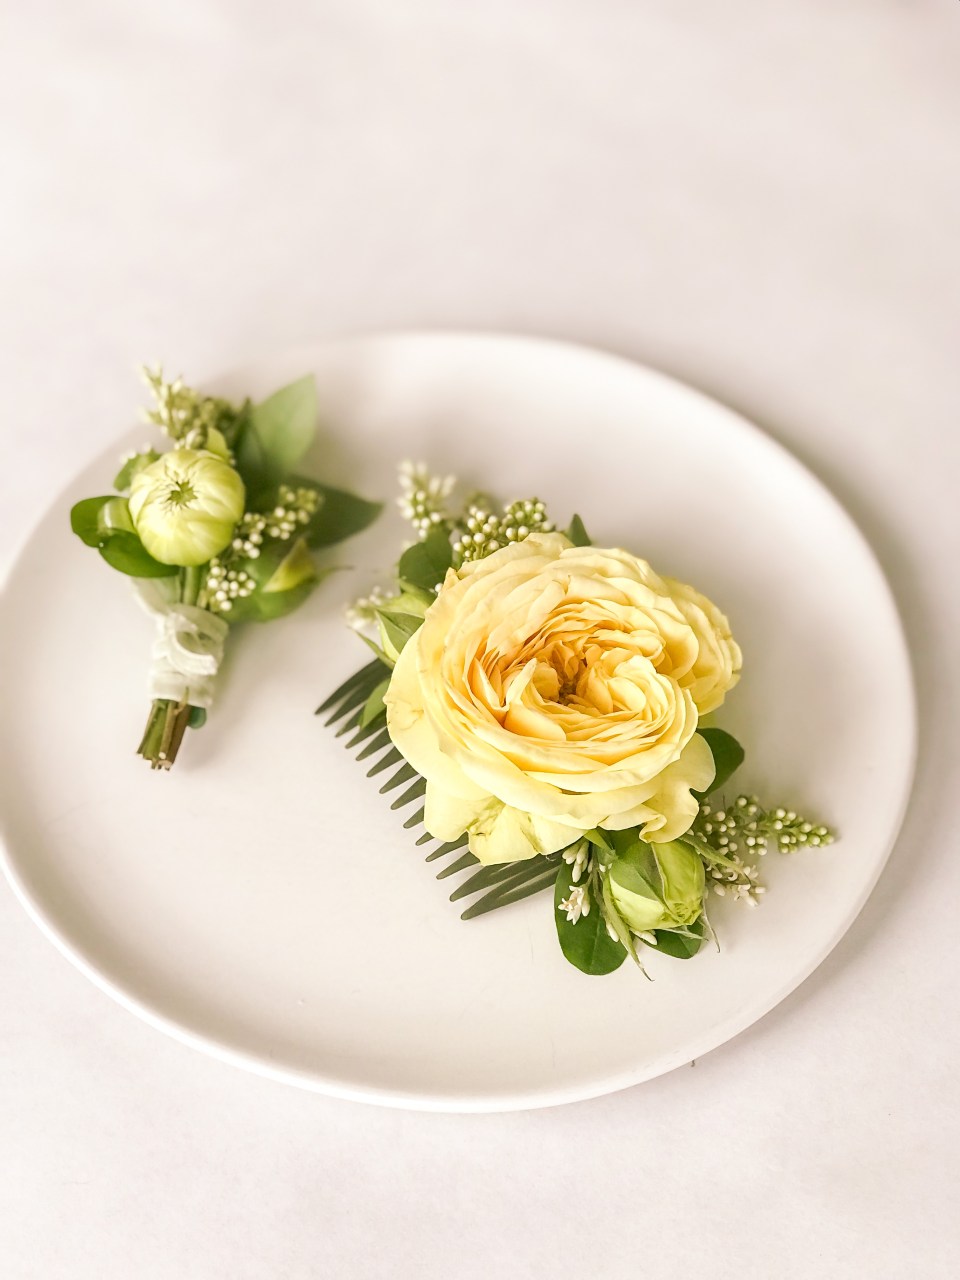
- Offset, cut your flower stems right off of the flowers you will exist using. You desire to accept no stem at all so that your flowers can be stuck right onto the backcomb with as much surface surface area touching as possible and no stems getting in the mode. Play around with placement of the flowers before adding the glue and committing to your pattern. For my backcomb I used a small-scale garden rose as my focal flower. Rose buds, astilbe and privet greenery effectually added interest. I liked the combination of textures and sizes of blooms.
- Once you are happy with your placement, pour some glue onto a cardboard scrap and let information technology to get tacky. Add together your flowers to the backcomb starting with your largest chemical element and then working your way downwardly in size. Tuck the stems of your flowers in underneath the other flowers so that information technology looks as though your flowers are naturally growing. The gum dries quickly but I suggest gently holding the flower in identify while it dries and so that it doesn't move.
- If y'all won't be wearing your floral comb for a few hours later on making it y'all tin place information technology in the fridge in a fully sealed container.
- Identify your DIY floral hair rummage into your hair do and enjoy looking like a Floral Princess!
If you're a blossom lover like we are, make sure to check out some of our other floral pattern posts beneath!


Follow Threads & Blooms on Instagram for daily updates!

How To Make A Floral Hair Piece,
Source: https://threadsandblooms.com/diy-floral-hair-comb/
Posted by: lugowhiseed.blogspot.com
0 Response to "How To Make A Floral Hair Piece"
Post a Comment